


Creative Video LUT Bundle
This bundle includes 5 .cube creative file LUTs, offering a variety of tones to give your footage that extra push for the mood you want to achieve. These files will work in any NLE, with whatever camera you shot with.
It’s highly recommended you adjust the strength of the LUT, based on the footage and your needs.
The Creative LUTs:
Vibrancy: Adds a color boost for a clean look.
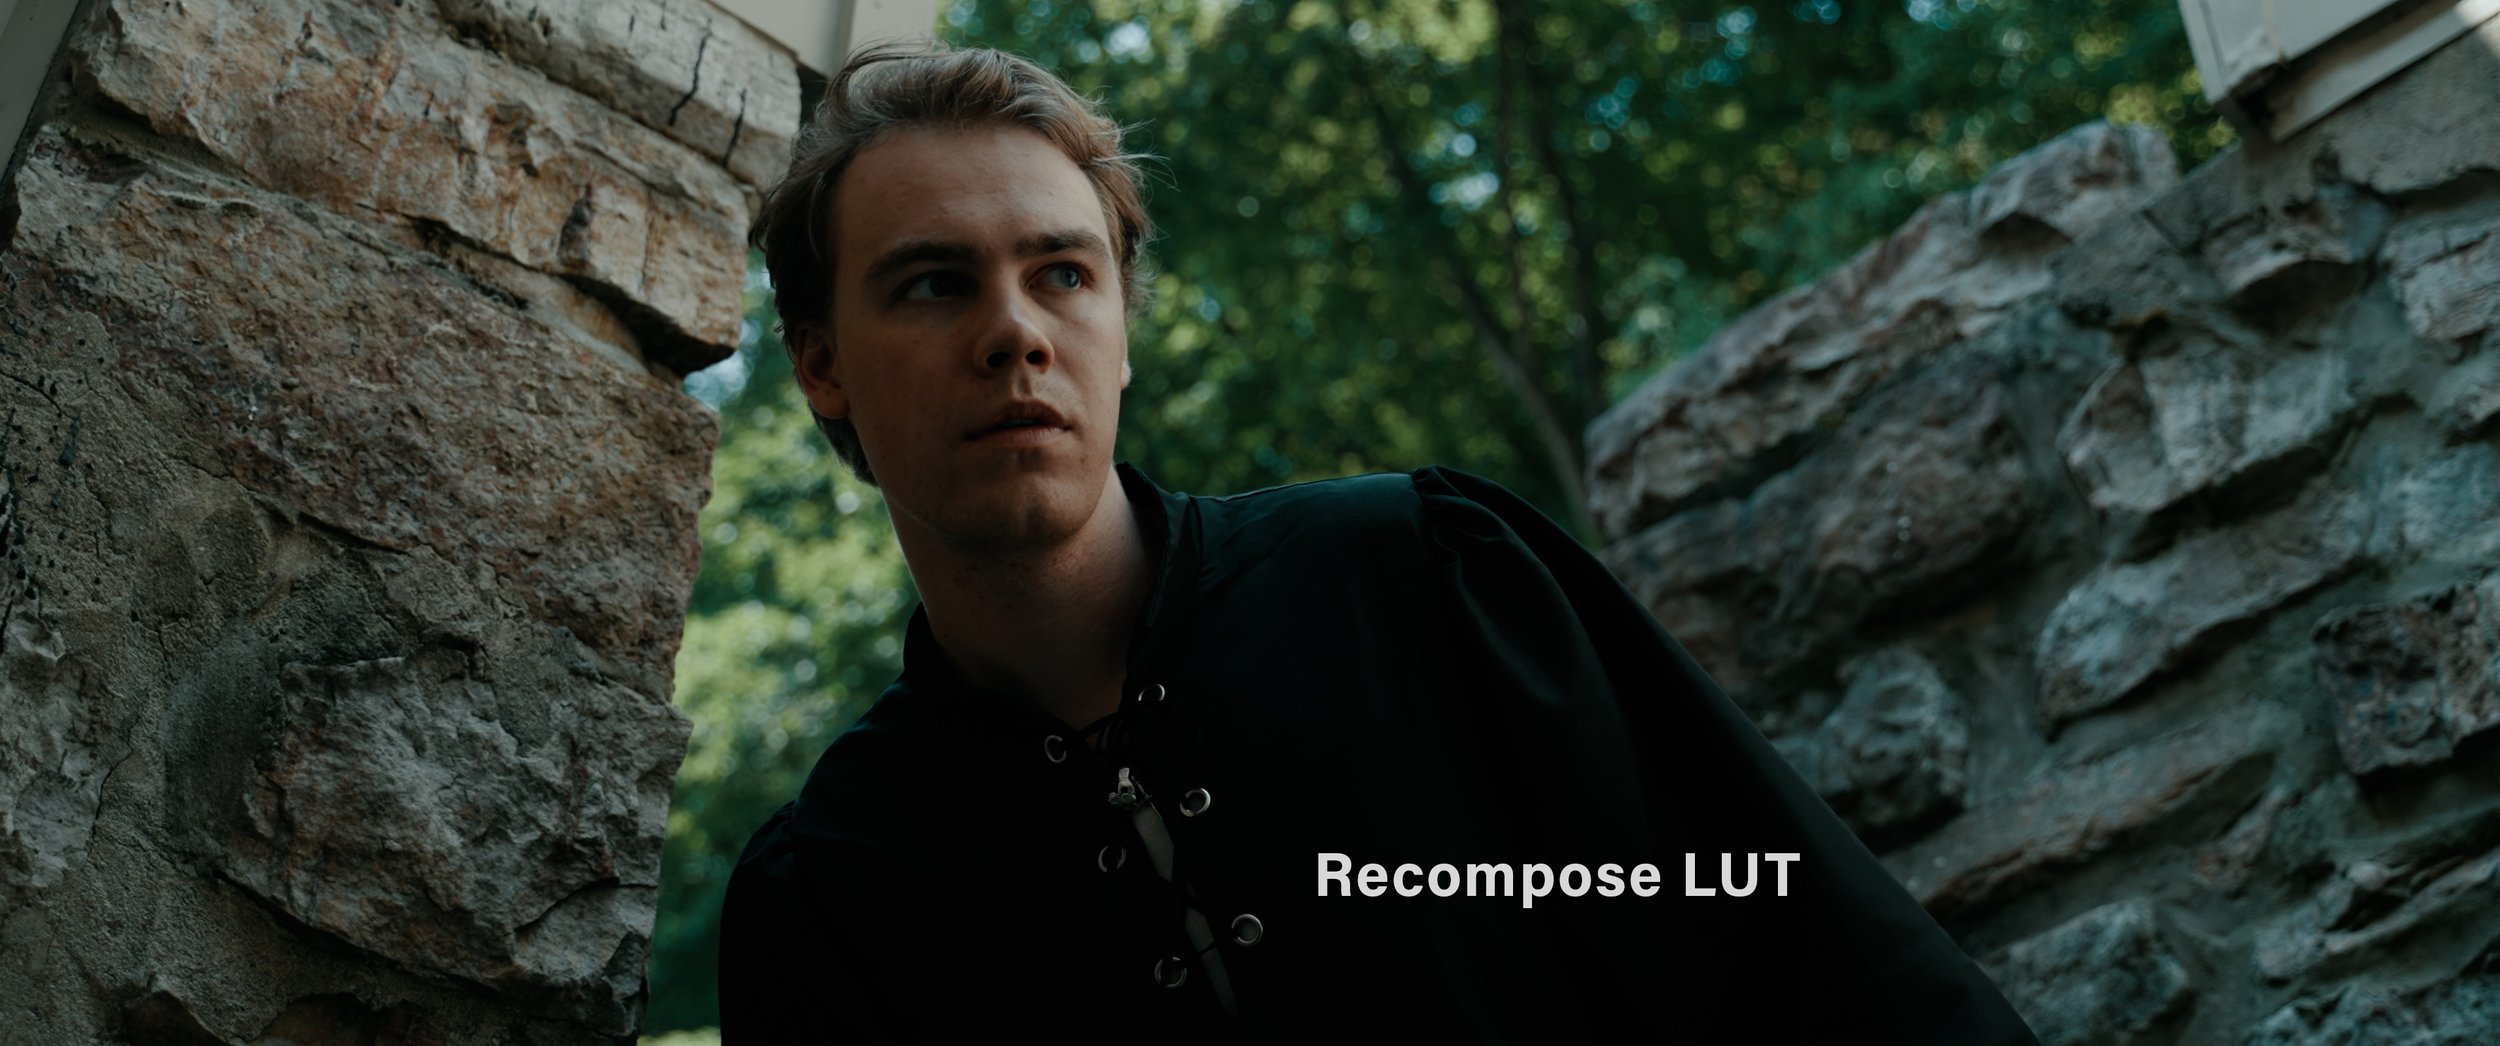
Recompose: Green, contrast heavy undertones that can balance nicely with a warmer white balance. Neutral white balance will emphasize the green tones even more.
Nostalgic: A soft and neutral 90s indie film-like look.
Kinalas: A heavy, warm and vibrant indie film-like look.
Detached: A mostly neutral, desaturated and somewhat cold look.
When shooting your footage, expose along the middle of your exposure meter in LOG, or slightly under or over if shooting in a Standard profile (-1.3 or +1.3).
In Adobe Premiere Pro: Using the Lumetri Color panel, import through the “Creative Look” tab.
In DaVinci Resolve: If using the Color Space Transform tool, add the creative LUT to a node AFTER the Output CST. Perform other color grading adjustments in-between your Input and Output CST. If using the Free S-Log 3 Conversion LUT from this store, add the creative LUT AFTER the conversion node. Further adjustments should be made in nodes between the Conversion and Creative nodes.
In Final Cut Pro: Drag the Custom LUT effect onto your clip, use the LUT dropdown to bring the creative LUT in through there.
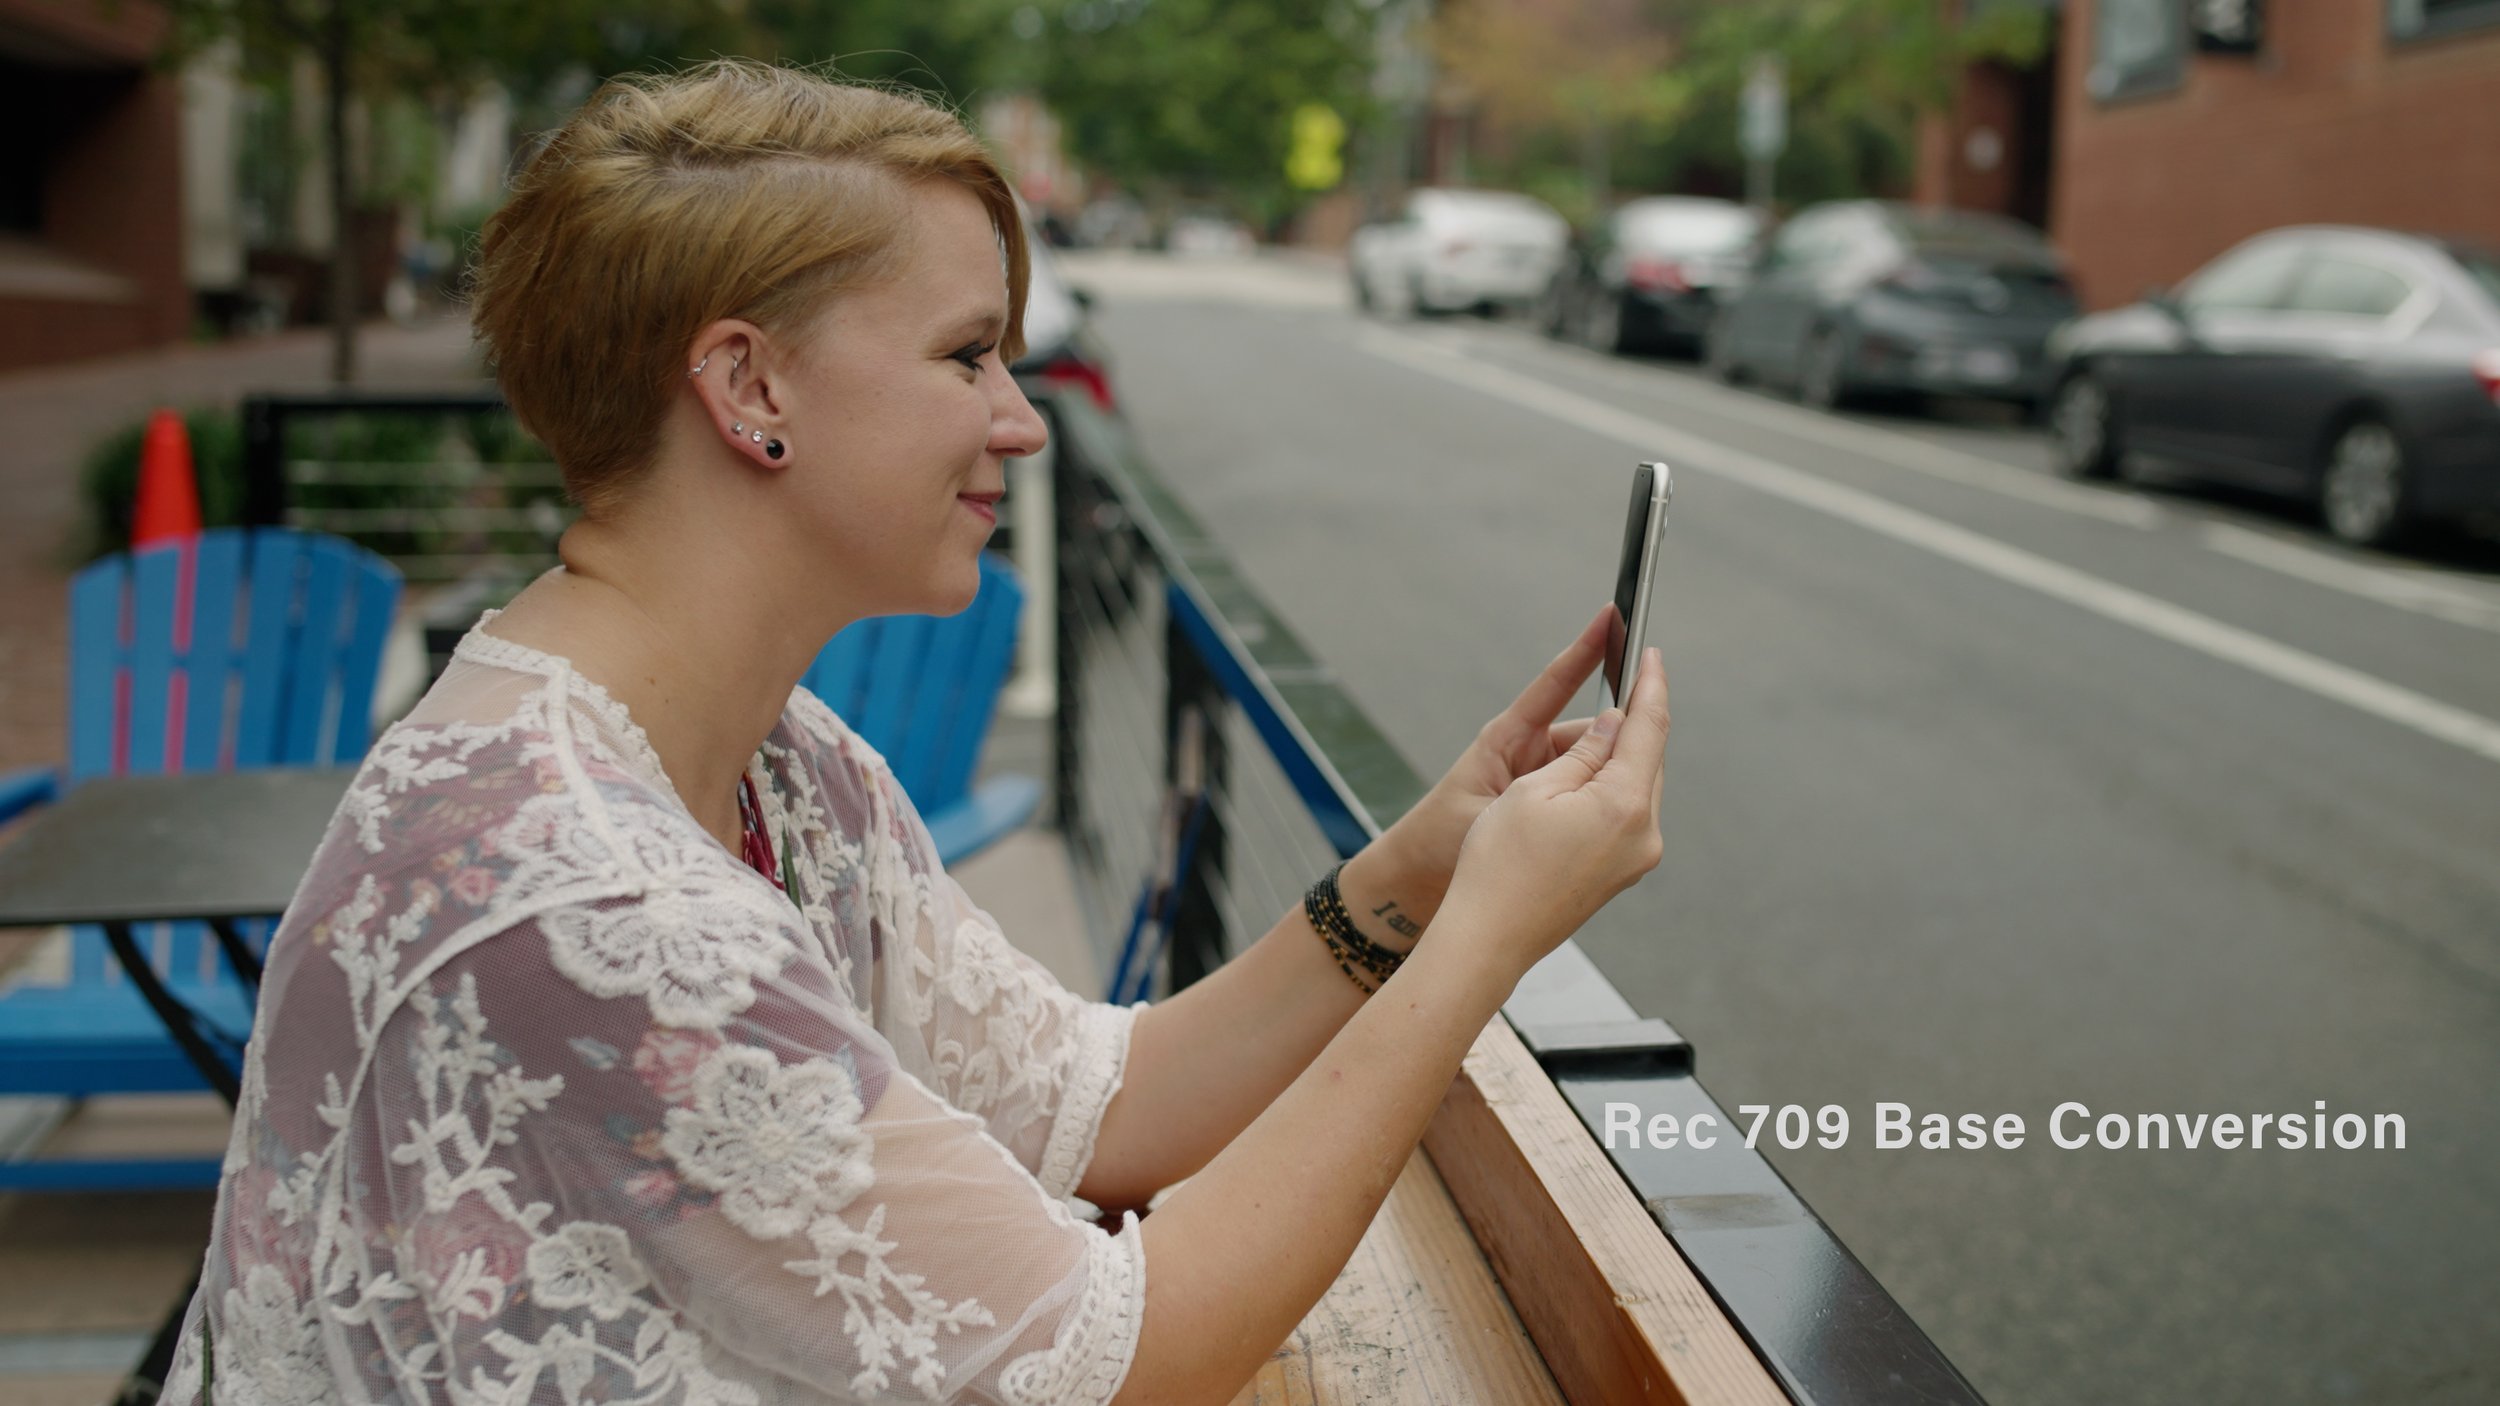
Please note: These are creative LUTs (for Color Grading), not rec.709 conversion LUTs (for Color Correction). If you’re shooting in the LOG format, please convert your footage to rec.709 before applying these creative LUTs.
This bundle includes 5 .cube creative file LUTs, offering a variety of tones to give your footage that extra push for the mood you want to achieve. These files will work in any NLE, with whatever camera you shot with.
It’s highly recommended you adjust the strength of the LUT, based on the footage and your needs.
The Creative LUTs:
Vibrancy: Adds a color boost for a clean look.
Recompose: Green, contrast heavy undertones that can balance nicely with a warmer white balance. Neutral white balance will emphasize the green tones even more.
Nostalgic: A soft and neutral 90s indie film-like look.
Kinalas: A heavy, warm and vibrant indie film-like look.
Detached: A mostly neutral, desaturated and somewhat cold look.
When shooting your footage, expose along the middle of your exposure meter in LOG, or slightly under or over if shooting in a Standard profile (-1.3 or +1.3).
In Adobe Premiere Pro: Using the Lumetri Color panel, import through the “Creative Look” tab.
In DaVinci Resolve: If using the Color Space Transform tool, add the creative LUT to a node AFTER the Output CST. Perform other color grading adjustments in-between your Input and Output CST. If using the Free S-Log 3 Conversion LUT from this store, add the creative LUT AFTER the conversion node. Further adjustments should be made in nodes between the Conversion and Creative nodes.
In Final Cut Pro: Drag the Custom LUT effect onto your clip, use the LUT dropdown to bring the creative LUT in through there.
Please note: These are creative LUTs (for Color Grading), not rec.709 conversion LUTs (for Color Correction). If you’re shooting in the LOG format, please convert your footage to rec.709 before applying these creative LUTs.